Skip to content
Unlocking the full potential of Adobe Illustrator demands a nuanced understanding of its features and functionalities. This article delves into ten meticulously curated tips, each poised to refine your approach to design within this sophisticated software. From streamlined window management techniques that enhance your precision in detailing, to the swift creation of logo grids for an organized and visually striking foundation, these insights serve as essential tools for designers seeking to elevate their craft.
Within the confines of Adobe Illustrator’s expansive toolkit, the intricacies of typography are unveiled, allowing for the customization of default text settings. Designers can seamlessly navigate the Character Style Options menu to establish default parameters, encompassing font selection, leading adjustments, and kerning settings. The exploration extends to stroke offset and editing, unveiling a realm of creative possibilities. By leveraging the Pathfinder option, designers can effortlessly edit text with an offset stroke, infusing unique and visually captivating effects into their designs. These tips traverse the spectrum of design intricacies, empowering professionals to wield Adobe Illustrator with mastery and finesse.
Tip 1: Tiled Windows for Efficient Designing
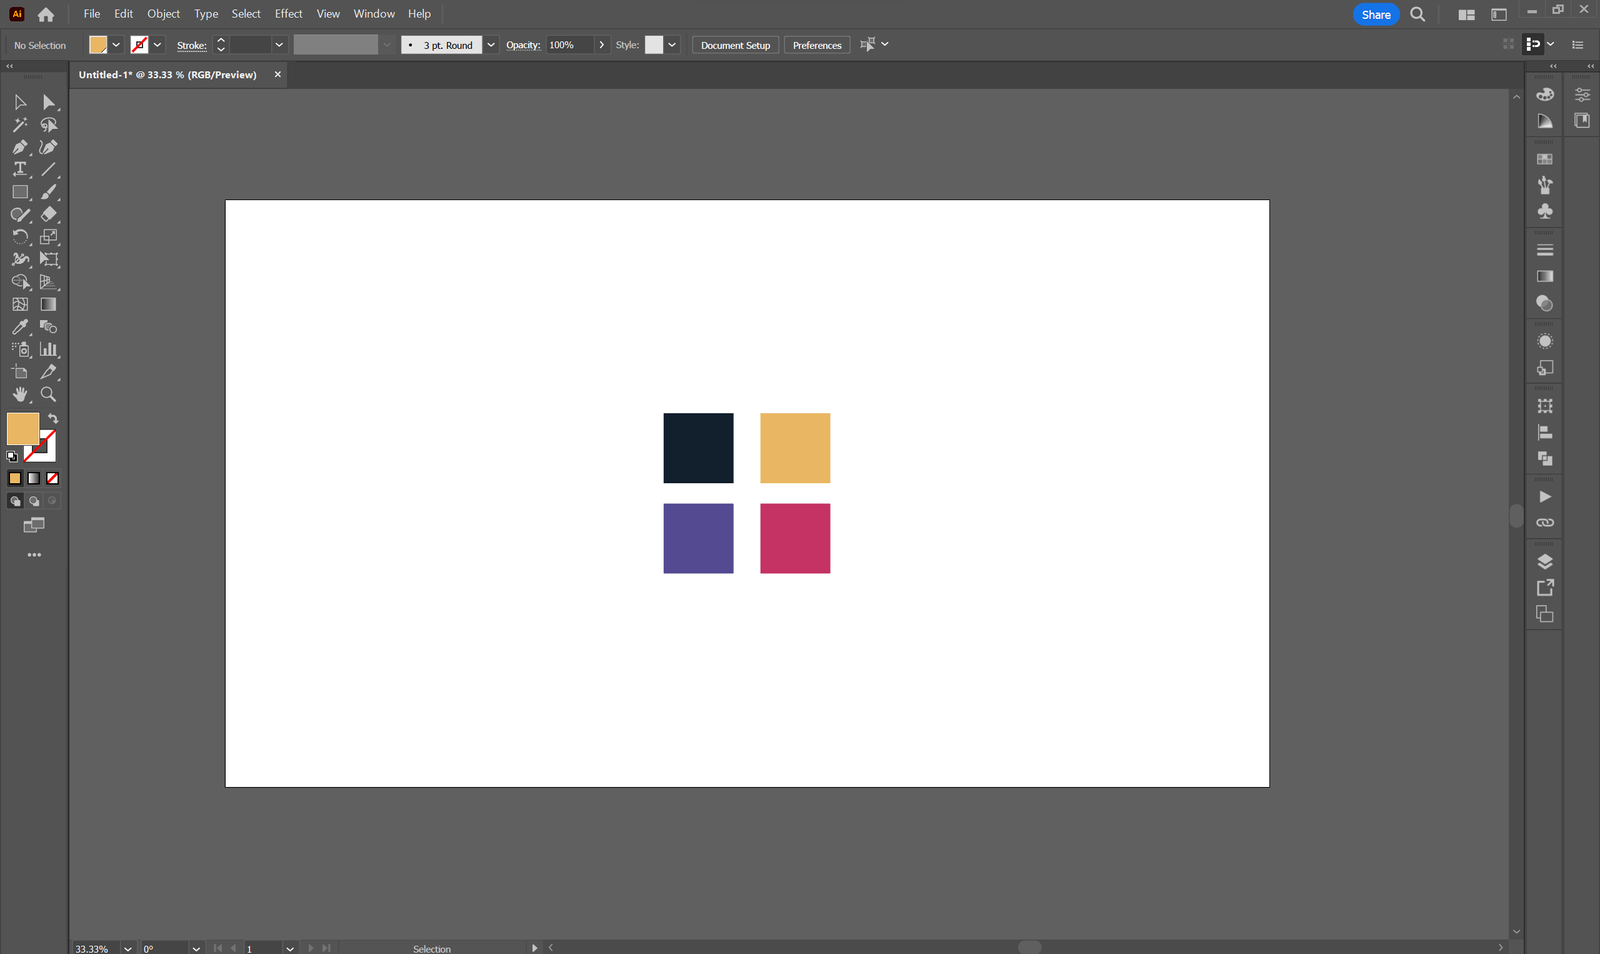
Managing multiple perspectives of a project can be a critical aspect of precision and efficiency. This technique enables designers to optimize their workspace, offering the advantage of simultaneously scrutinizing intricate details while maintaining an overarching view of the entire design. By arranging multiple windows in a tiled orientation, designers can strategically zoom into specific aspects of their project in one window while keeping a broader perspective in another.
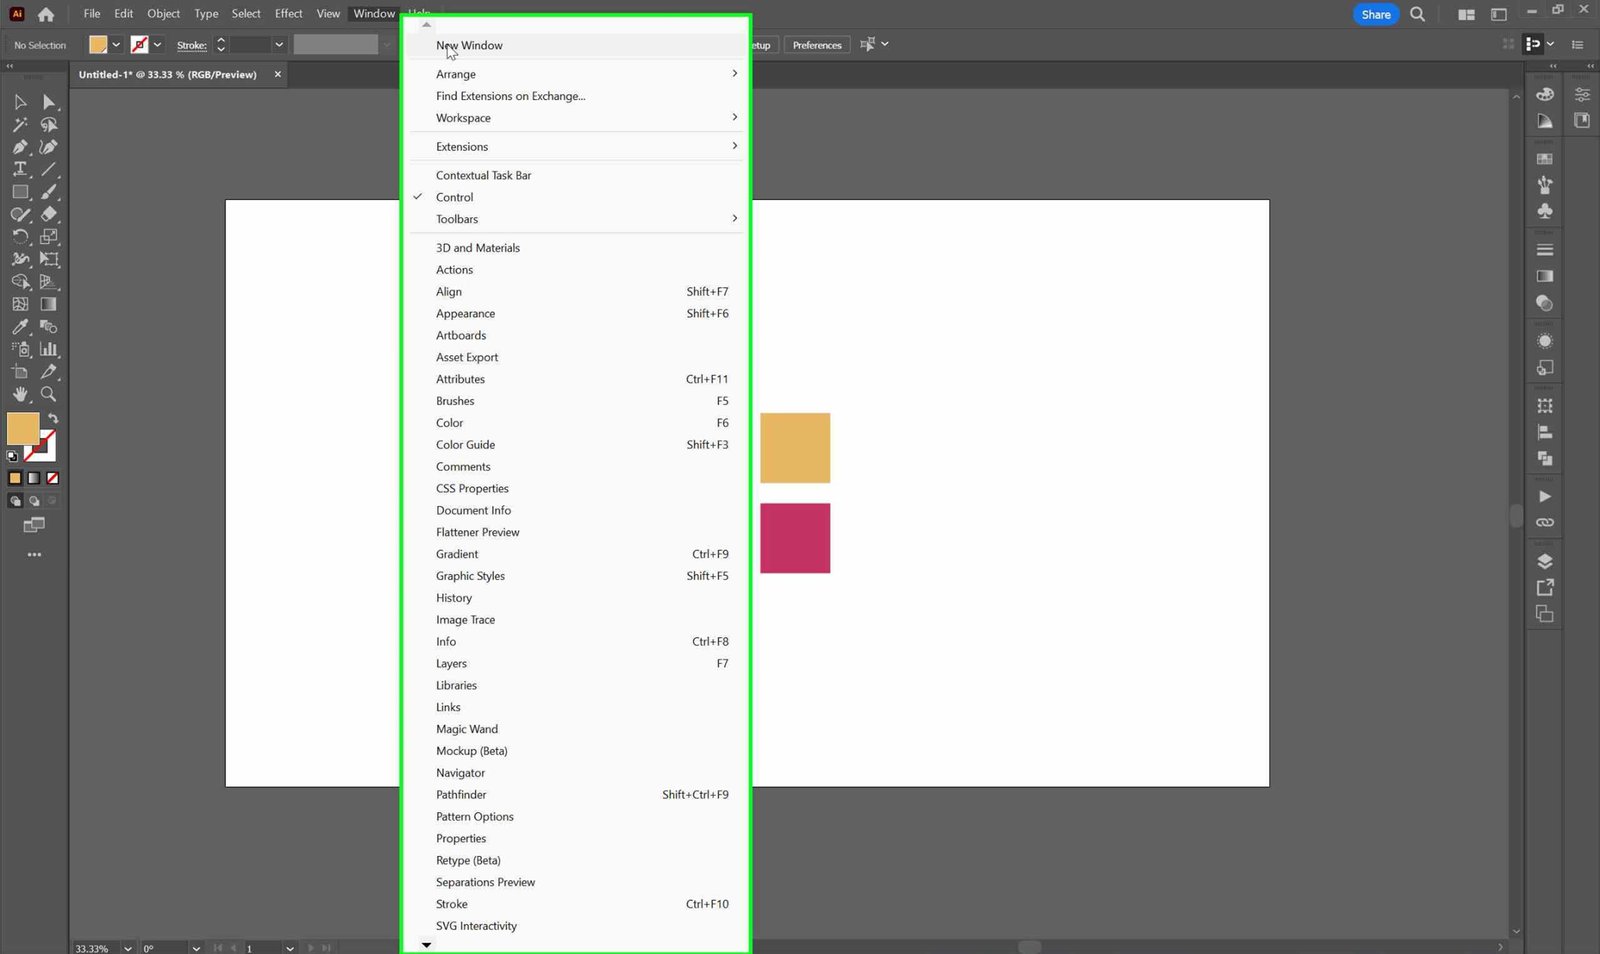
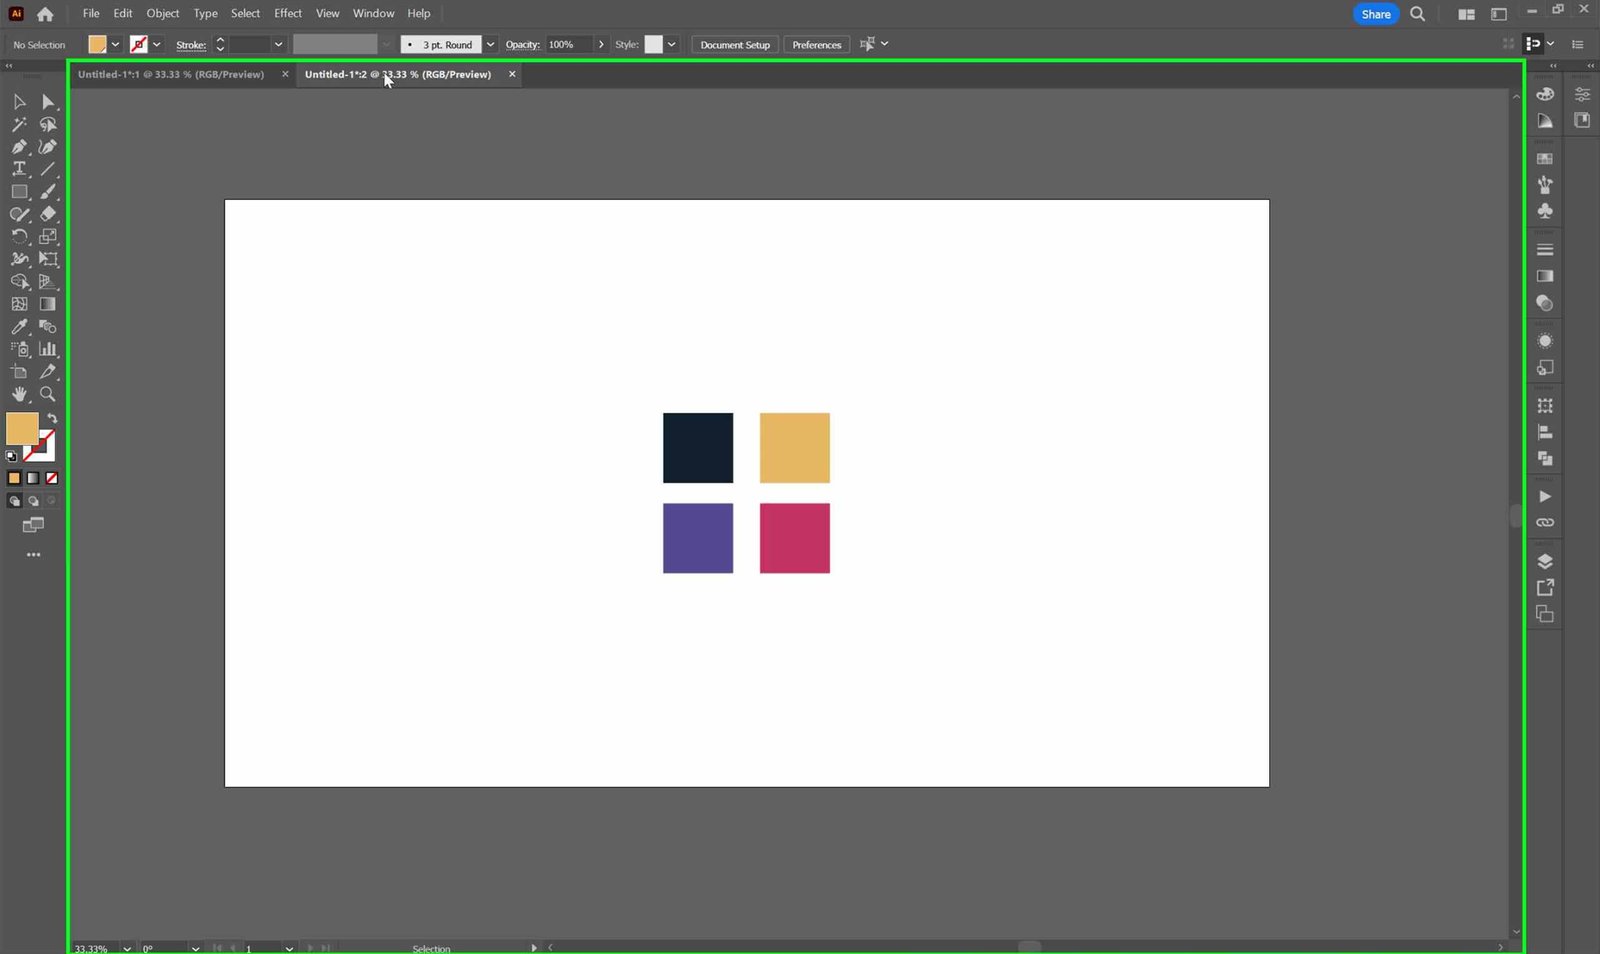
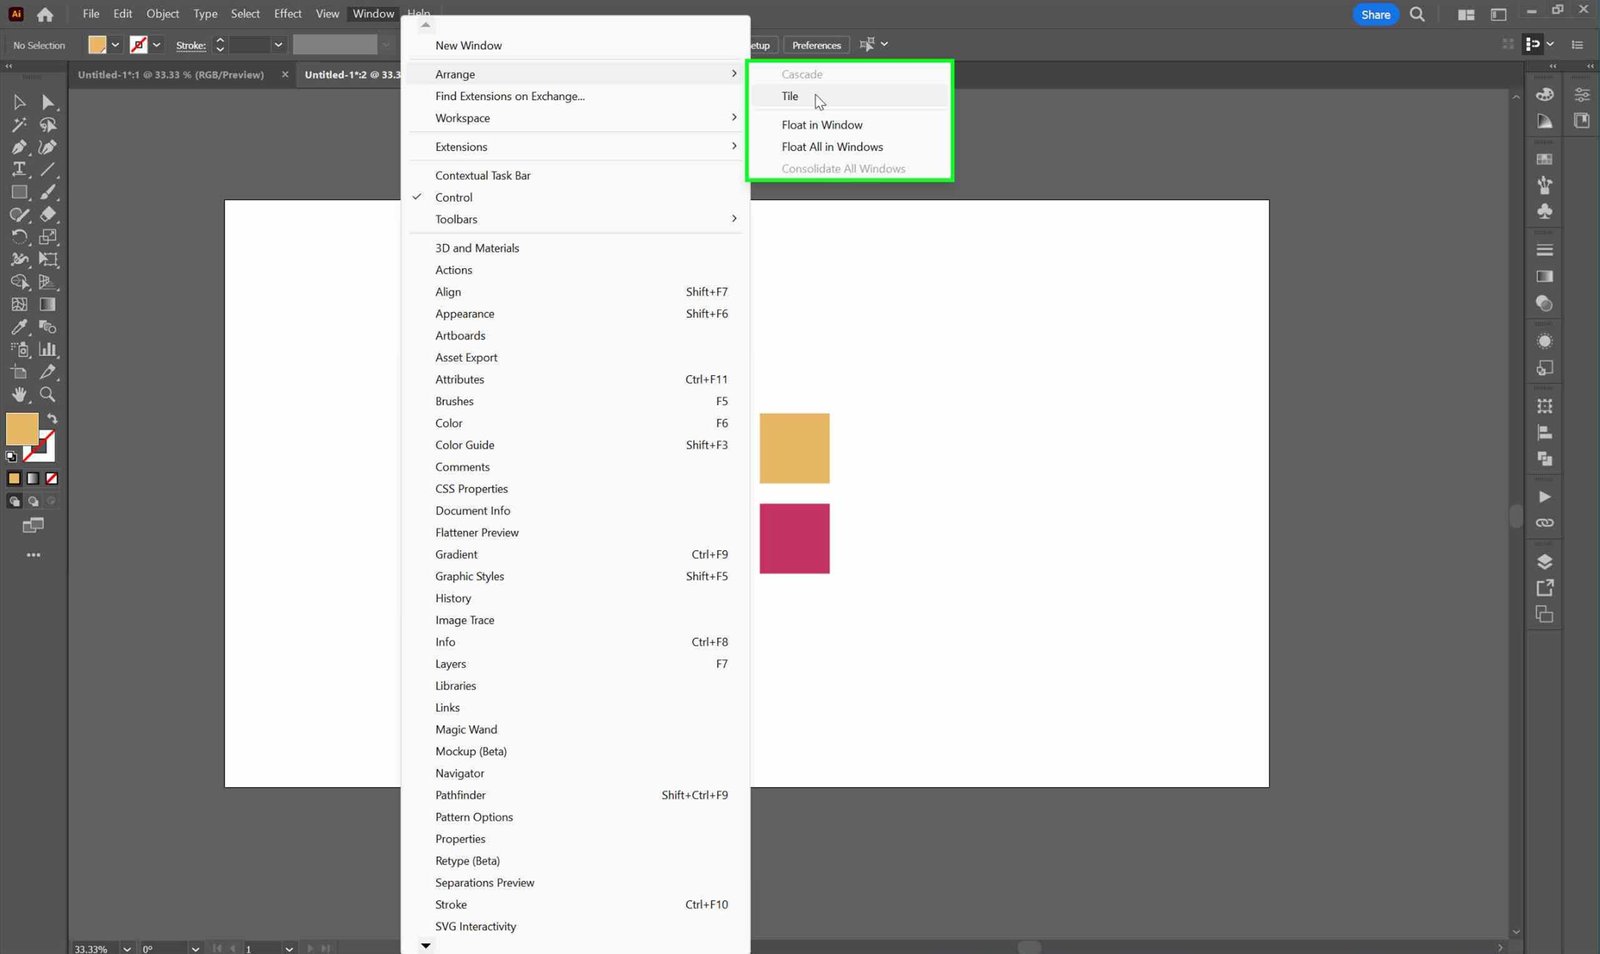
To employ this method effectively, designers can start by clicking on “Windows” and selecting “New Window.” This action opens another version of the same project in a secondary window. Once the dual windows are active, navigate to “Windows” and select “Arrange” followed by “Tile”.
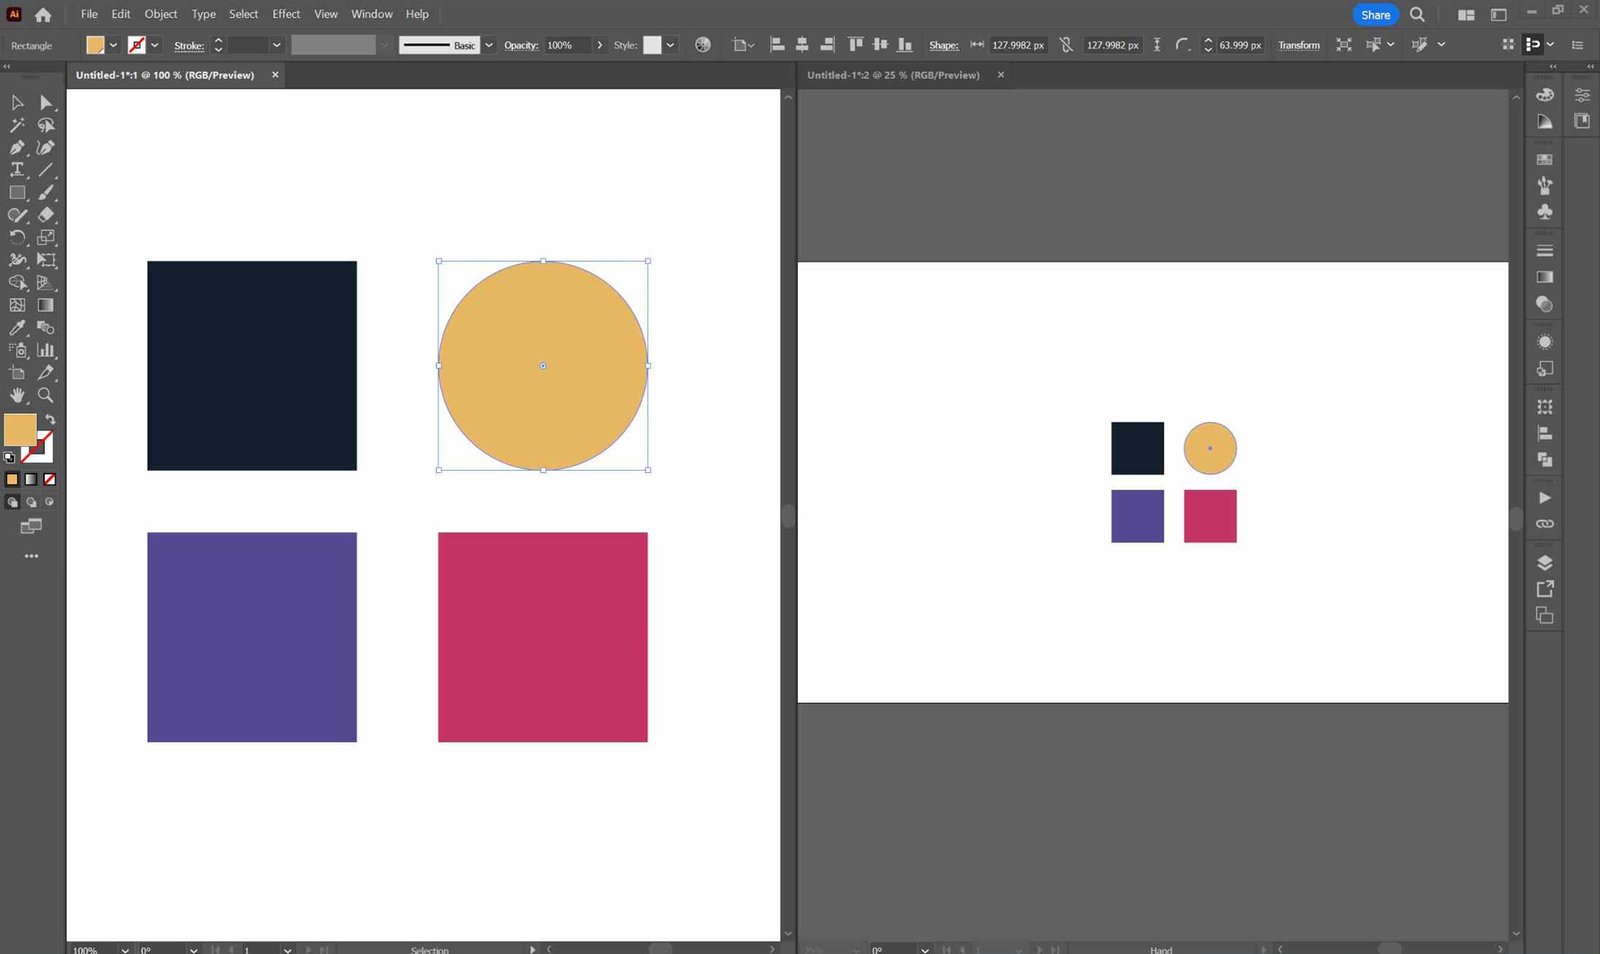
The significance of this method becomes more apparent when working on projects that demand meticulous attention to detail, such as logo design or illustration. As the windows are tiled, designers can easily switch between a micro and macro view of their designs, ensuring precision in their work. Furthermore, the ability to hide anchor points with a simple keyboard shortcut, such as Command/Ctrl + H, adds an extra layer of refinement to the process. With anchor points temporarily concealed, the designer can concentrate on refining specific elements, fostering a more focused and distraction-free environment. This approach not only enhances workflow but also contributes to a more dynamic and immersive design experience within Adobe Illustrator.
Tip 2: Quick Grid and Guide Creation
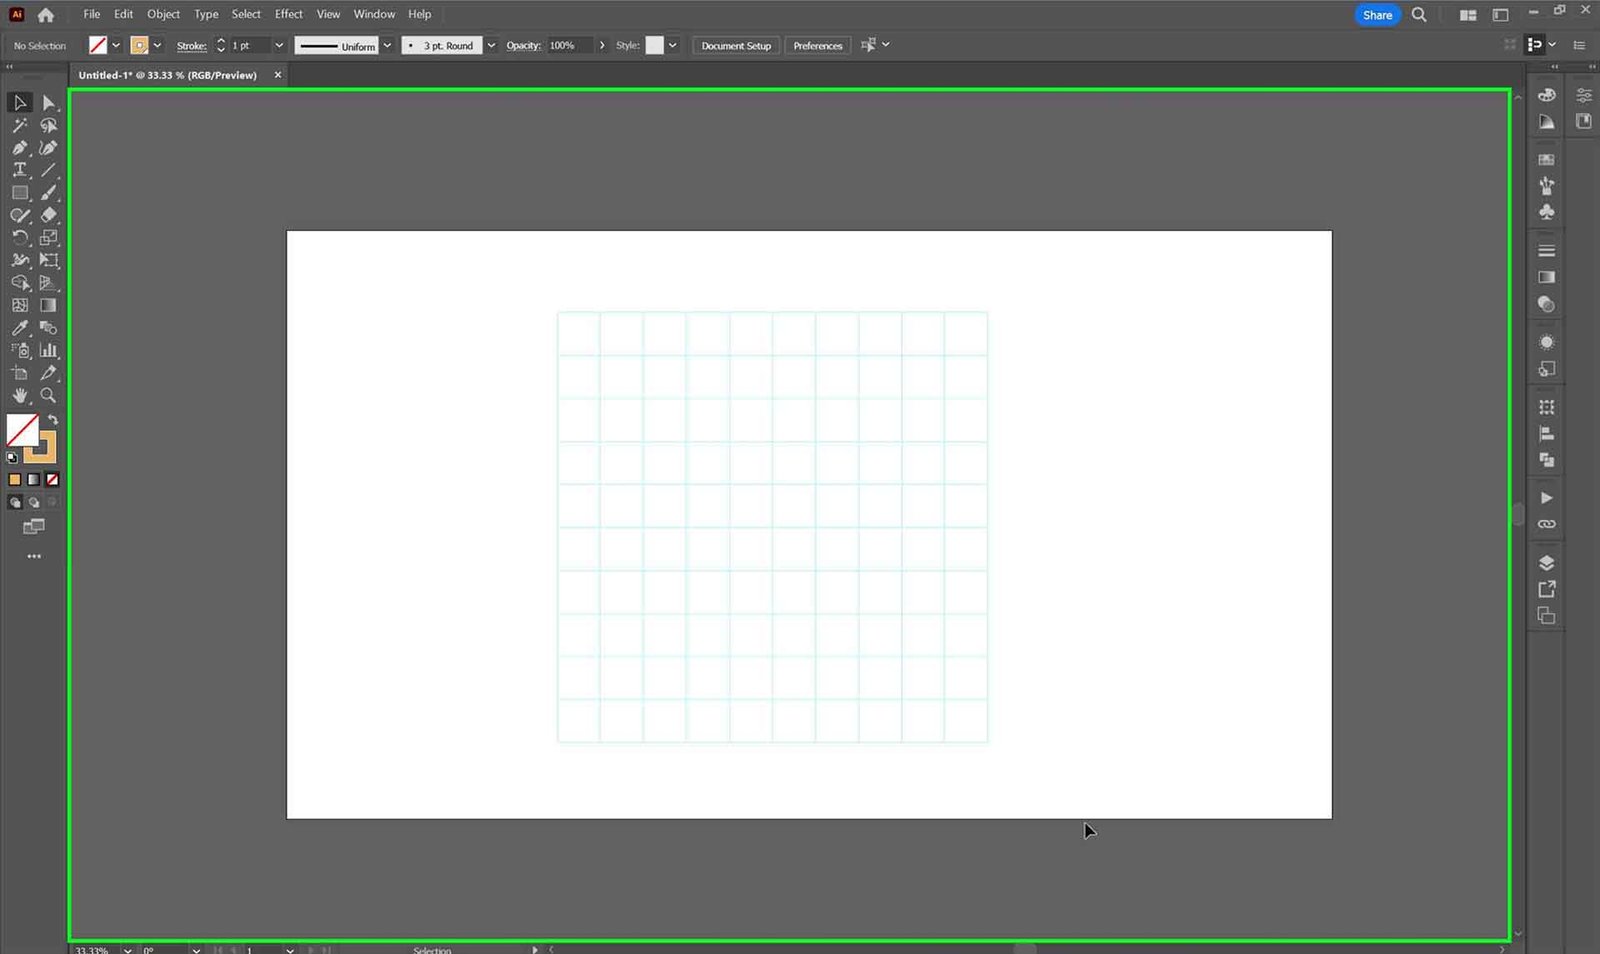
One of the hidden gems within Adobe Illustrator lies in its capability for rapid grid creation. This feature proves invaluable for designers aiming to establish a well-organized foundation for their logos or designs. To initiate this process, designers need to create an object the size they need, for example rectangle in the size of the artboard. After that, navigate to “Object,” select “Path,” and then choose “Split to Grid.” This simple yet powerful command opens a window offering full customization over the grid’s columns, rows, and gutter options.
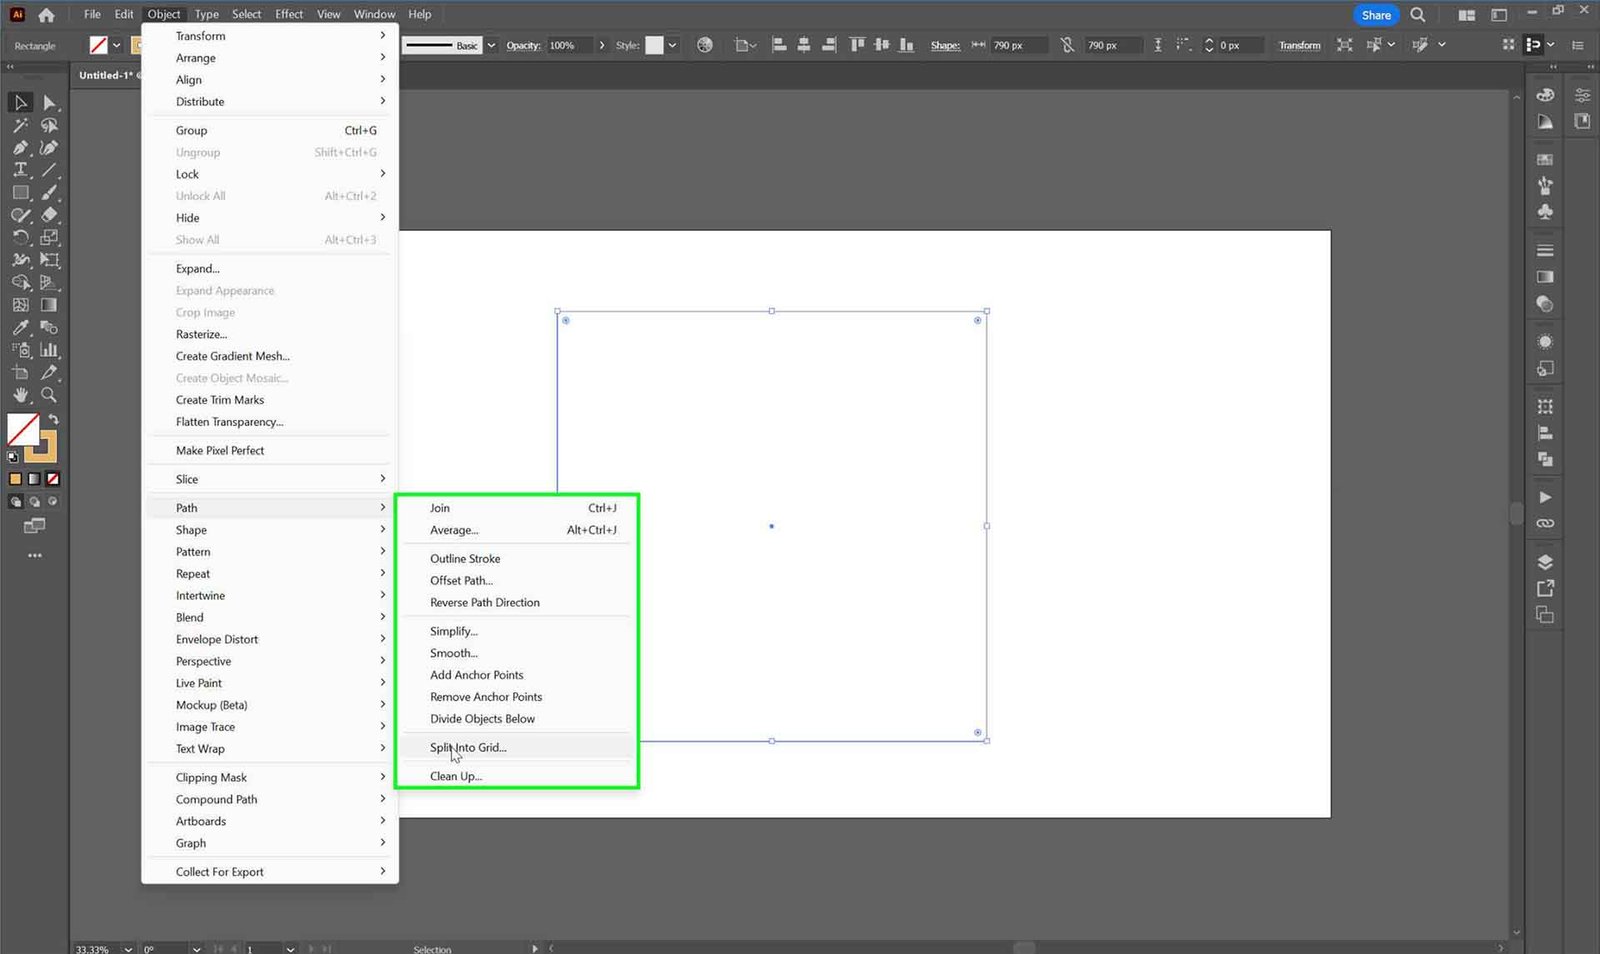
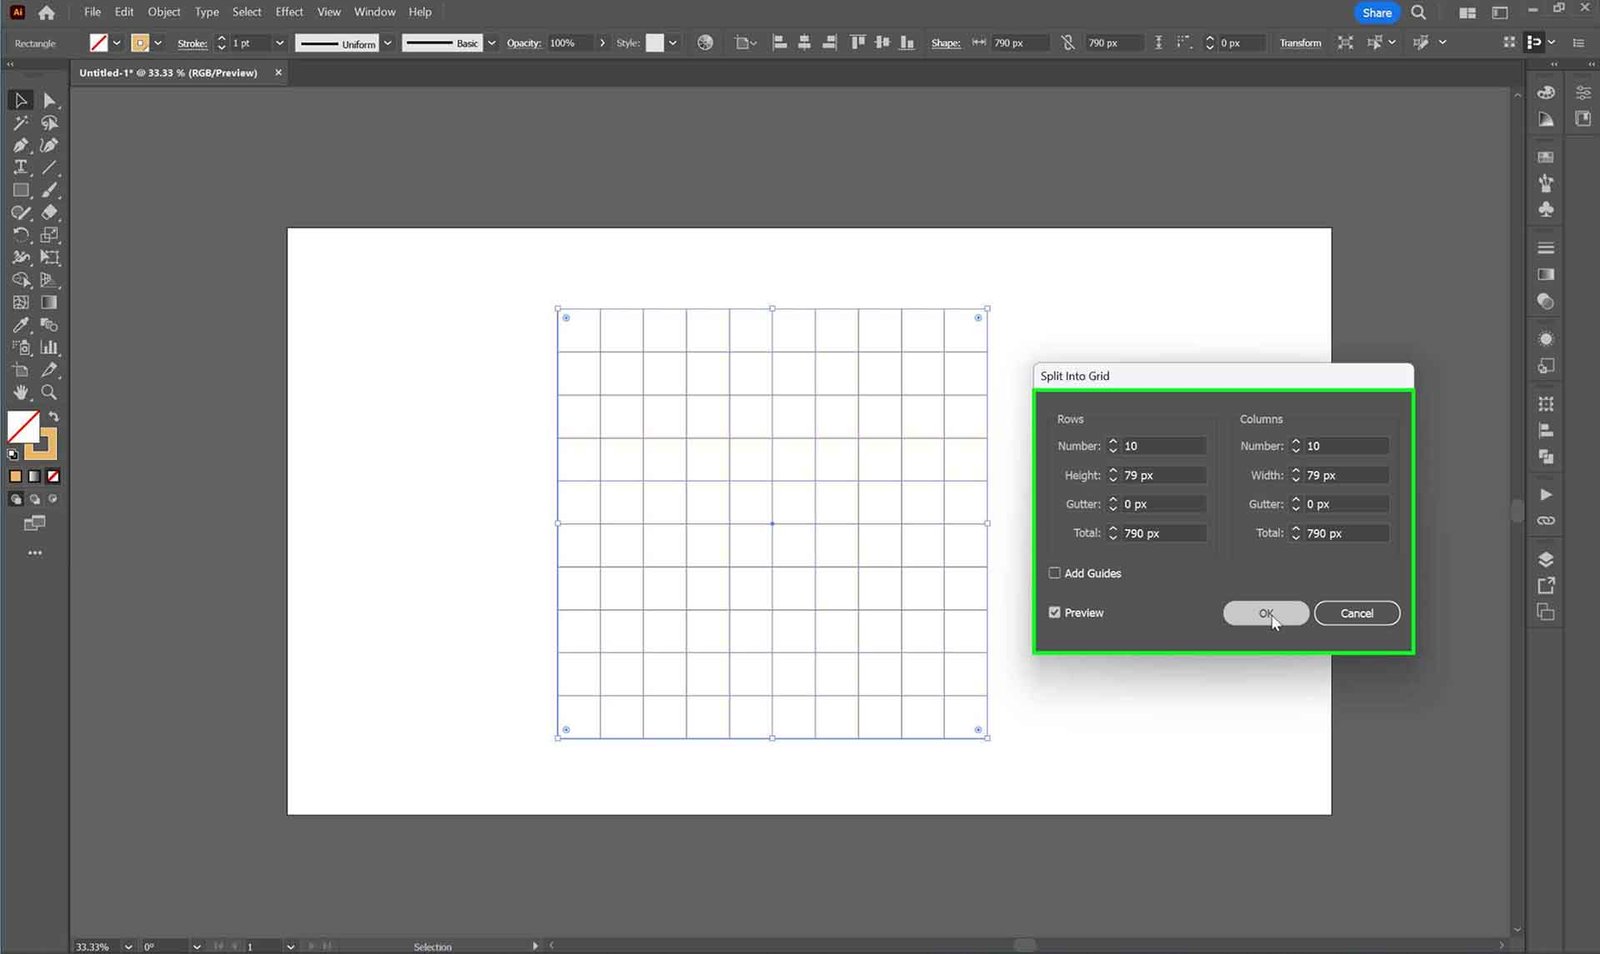
The speed and flexibility of this grid creation method are particularly advantageous for designers aiming to infuse their logos with balance and coherence. Once the grid is in place, designers can take it a step further by right-clicking on the artboard and converting the grid into guides (selecting the grids > right-click > Make Guides). This transformation ensures precise alignment, a crucial aspect of logo design where every element needs to harmonize seamlessly. This method, when mastered, empowers designers to create intricate logo designs efficiently, a testament to the nuanced capabilities embedded within Adobe Illustrator.

Tip 3: Customizing Default Text Settings
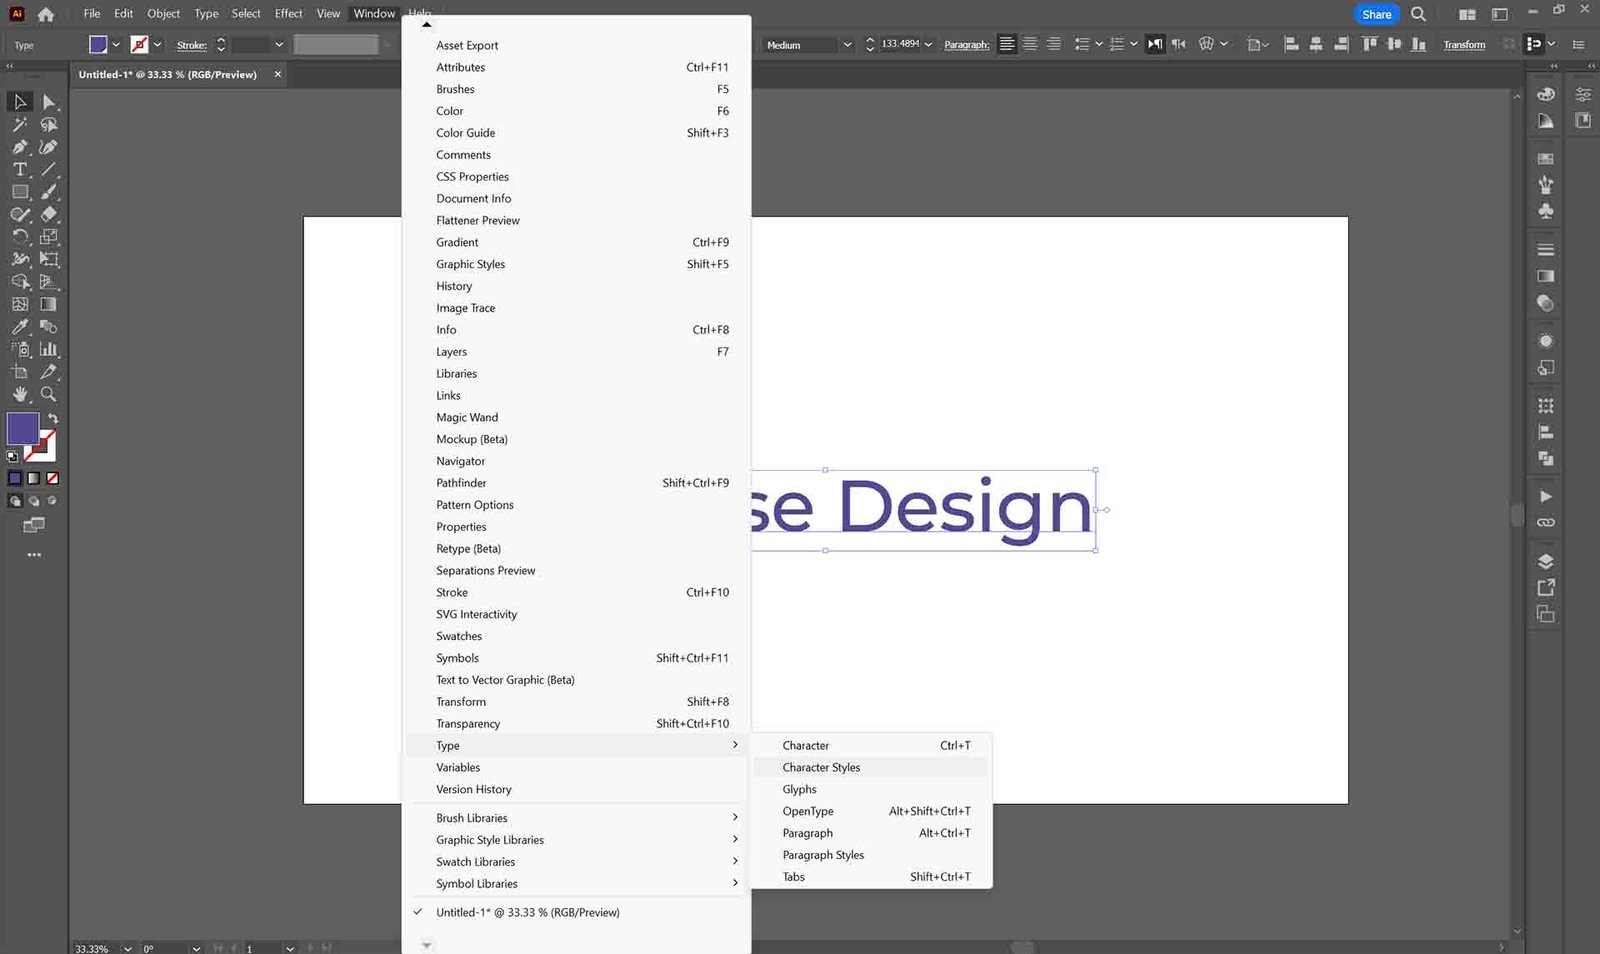
Typography serves as the cornerstone of effective design, and Adobe Illustrator provides designers with customizing default text settings. This feature empowers designers to shape the very foundation of their textual elements. By delving into the Character Style Options menu, accessible through the type panel (Window > Type), designers gain comprehensive control over their default text parameters.
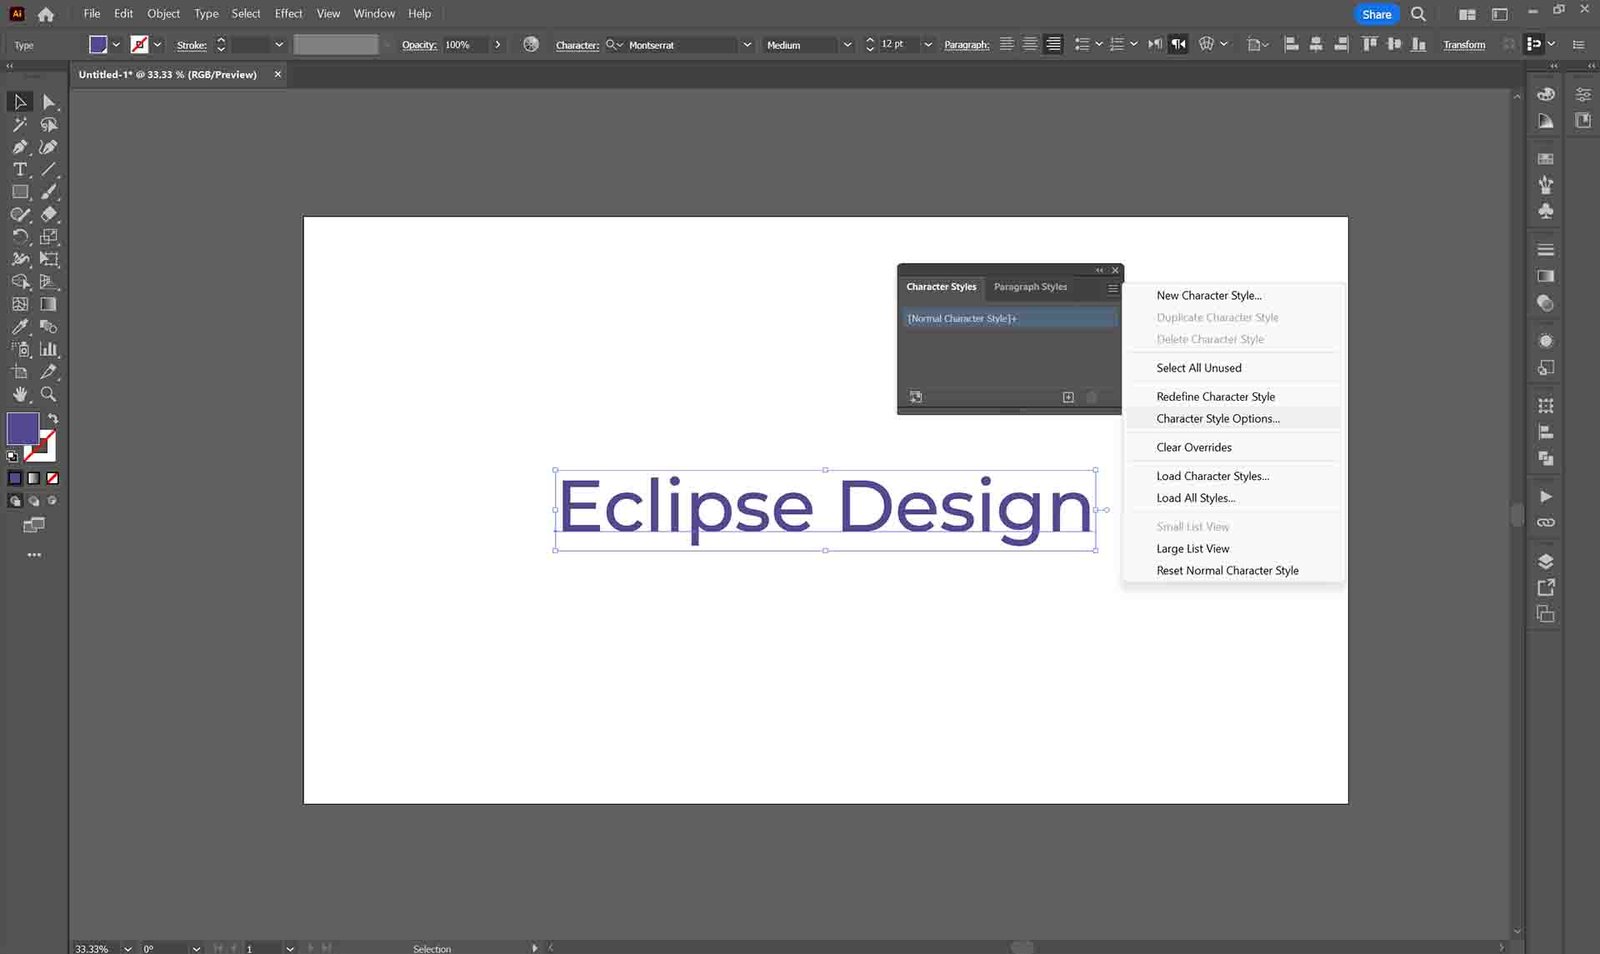
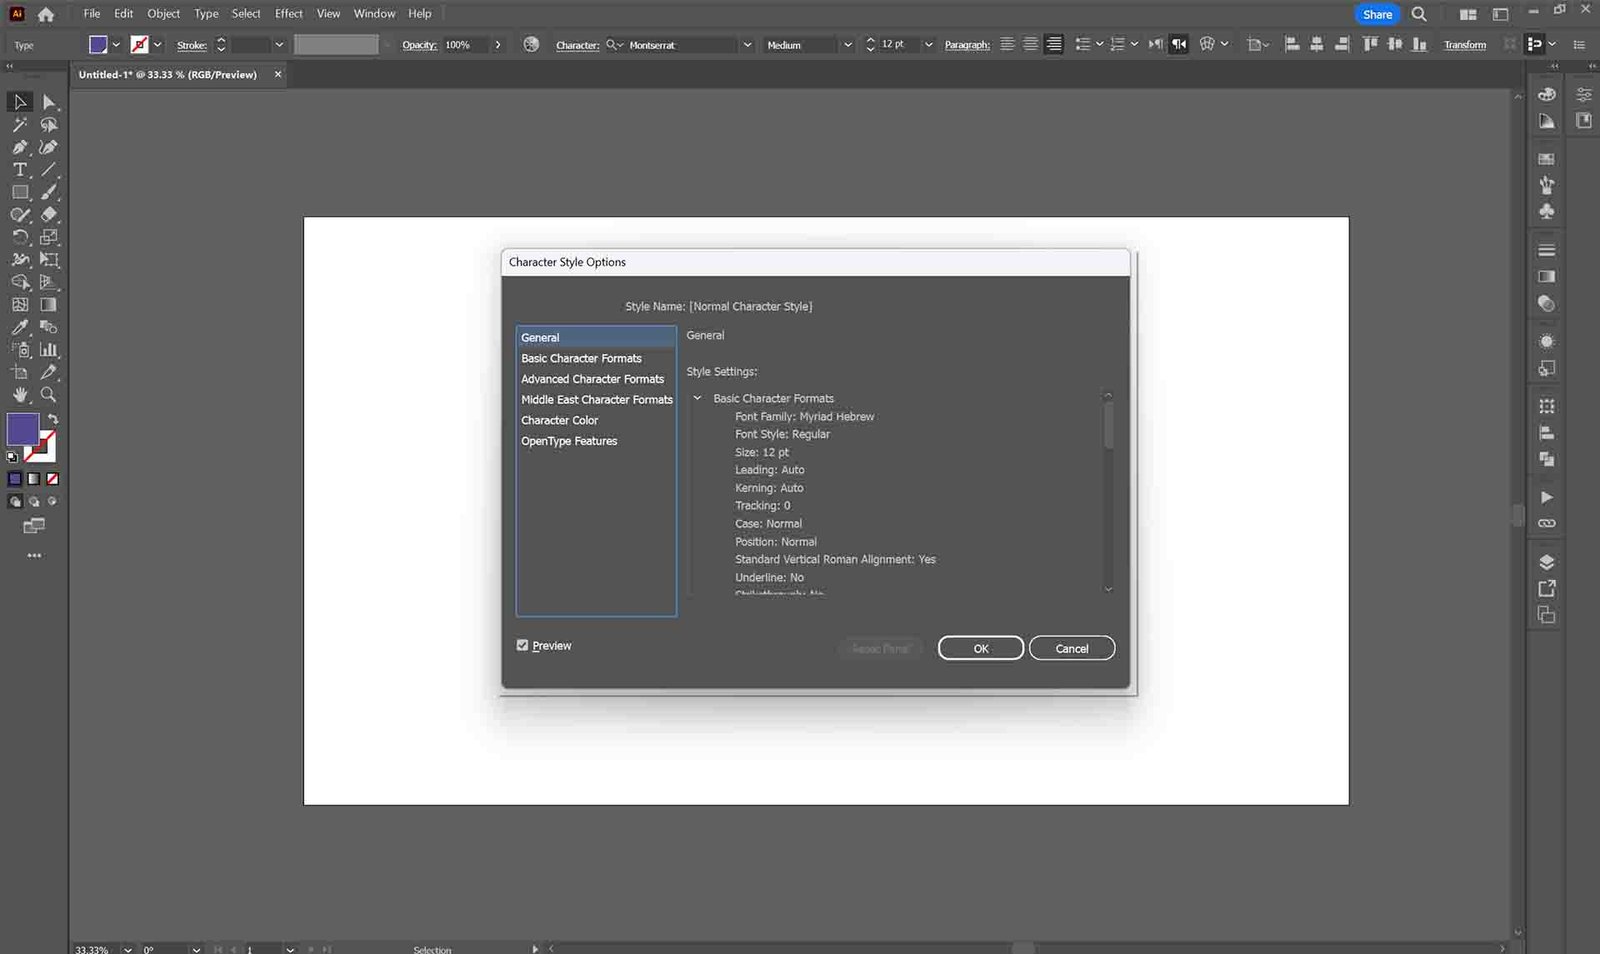
Here lies the ability to redefine not only the font but also leading and kerning settings. Choosing a default font that aligns with the design aesthetic is just the beginning. Designers can set the leading, adjusting the spacing between lines, to enhance readability and visual harmony. Kerning settings, which dictate the spacing between individual characters, can also be fine-tuned. The depth of customization available in this menu ensures that designers can establish a personalized and cohesive typographic style across their projects.
In addition to font, leading, and kerning, designers can explore other subtle yet impactful settings. These include options like tracking, enabling them to modify the overall spacing between characters uniformly. Moreover, the ability to set default text parameters extends to more nuanced preferences such as baseline shift and horizontal scaling. This hidden feature not only streamlines the text creation process but also allows designers to imprint their signature style on every textual element effortlessly. The result is a harmonious and consistent typography foundation that elevates the overall visual impact of their designs
Tip 4: Stroke Offset and Editing
Adobe Illustrator offers designers a powerful feature for creative expression through stroke offset and editing. This feature allows designers to infuse their designs with unique and visually captivating text effects. The process begins by adding a stroke to the text using the appearance panel and then offsetting it, creating a distinctive visual impact.
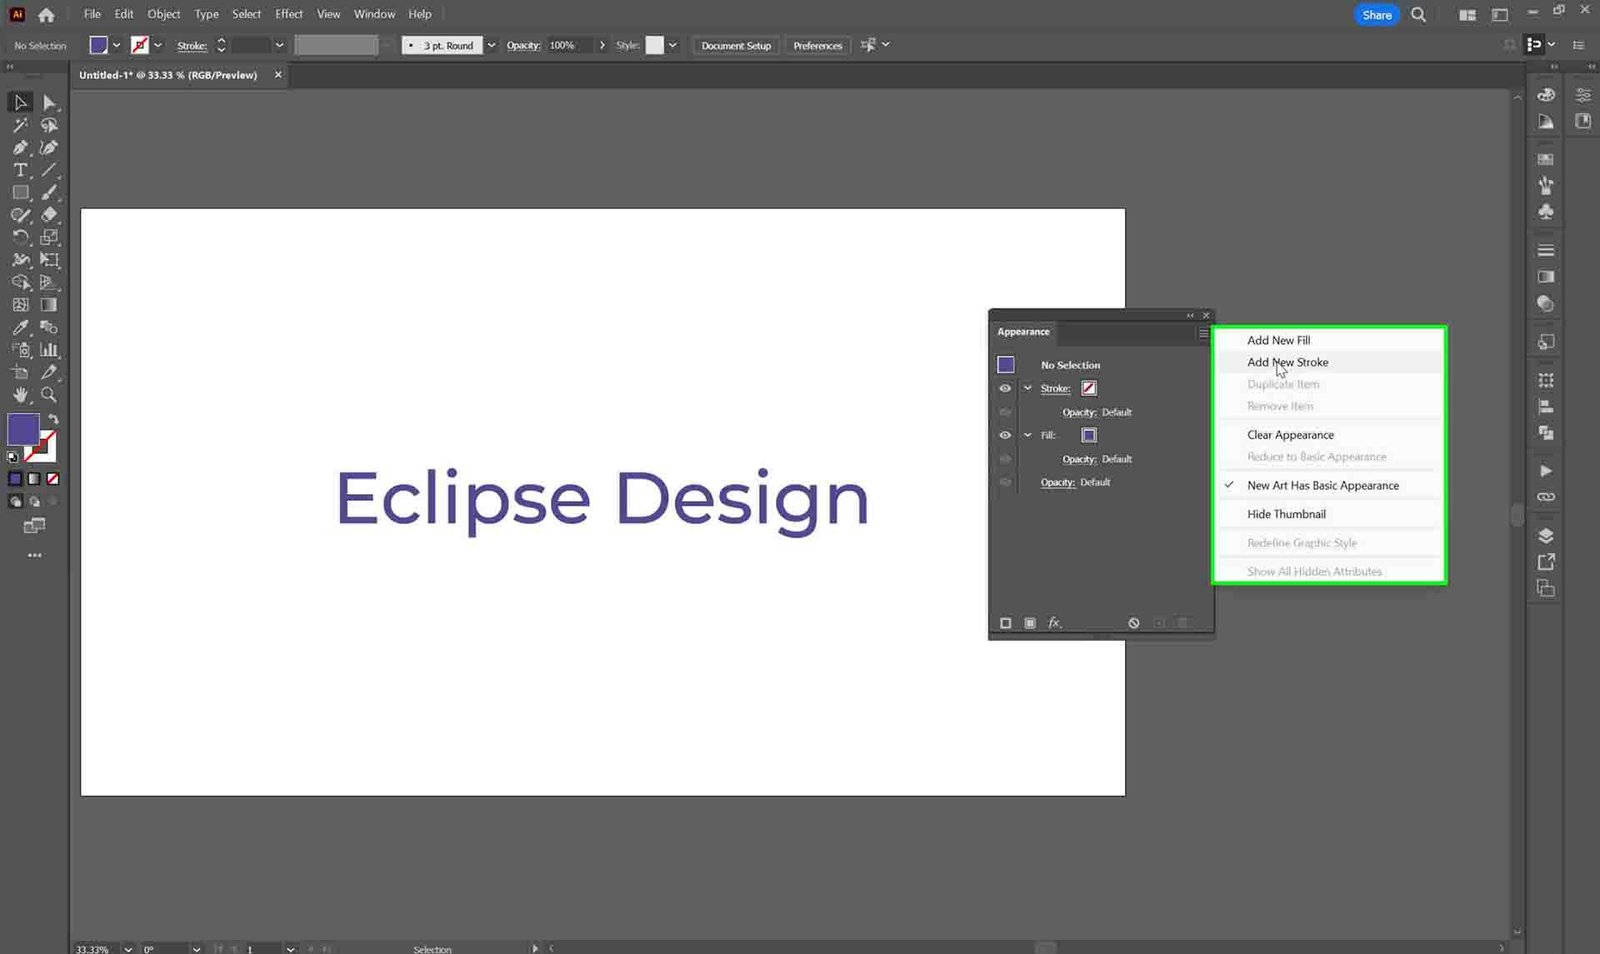
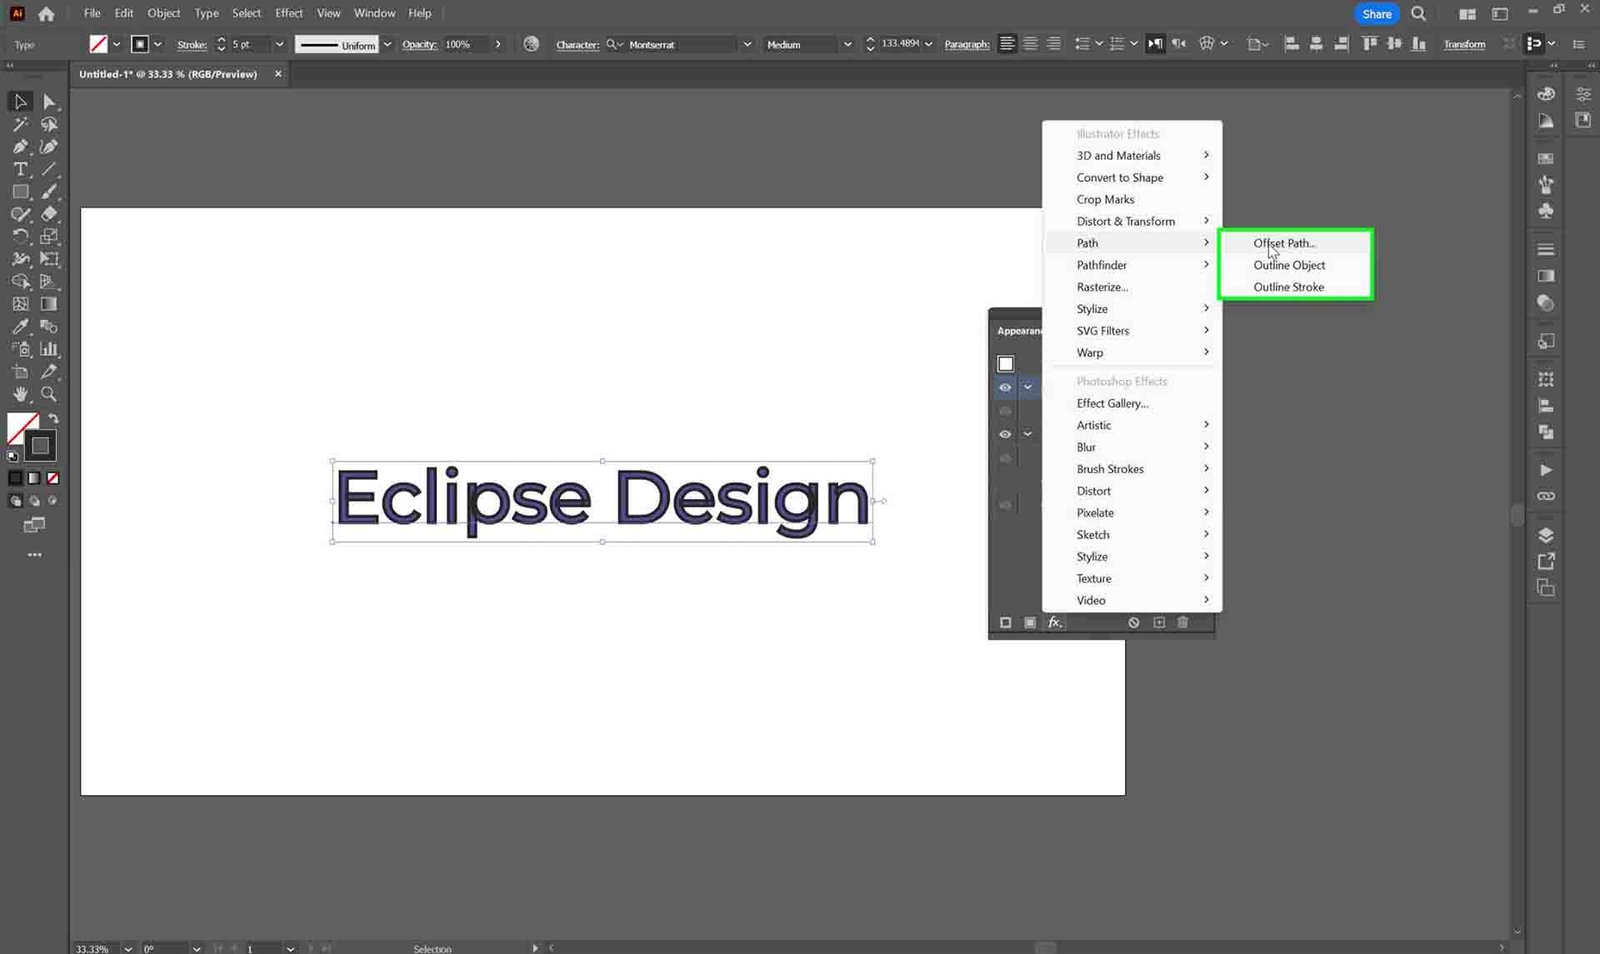
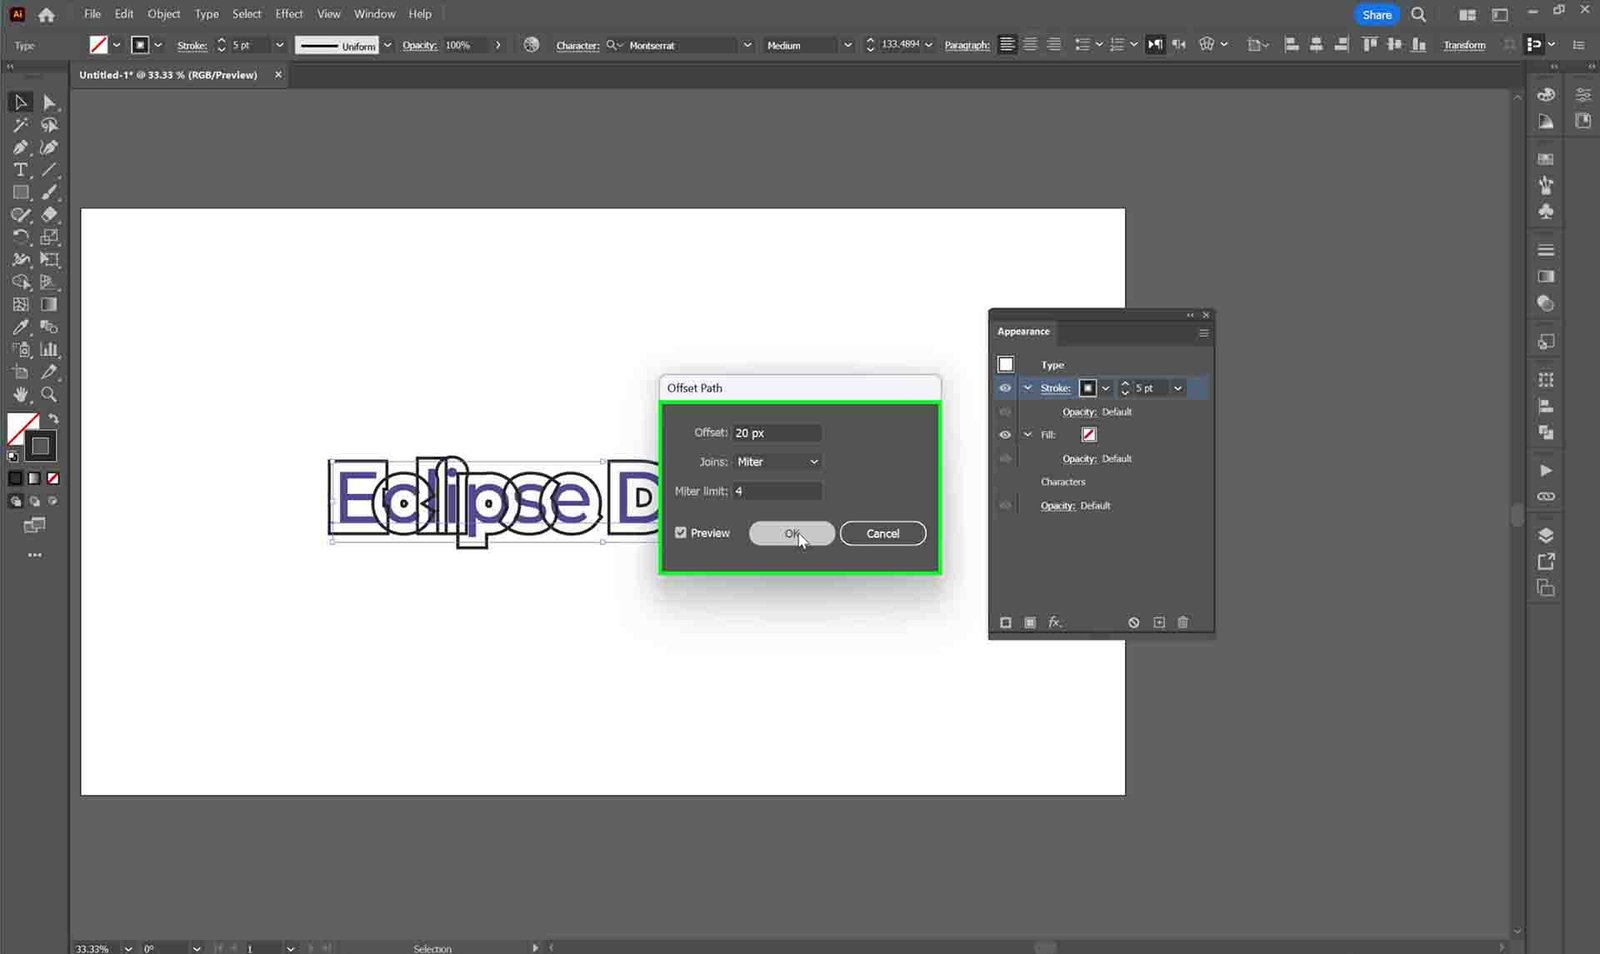
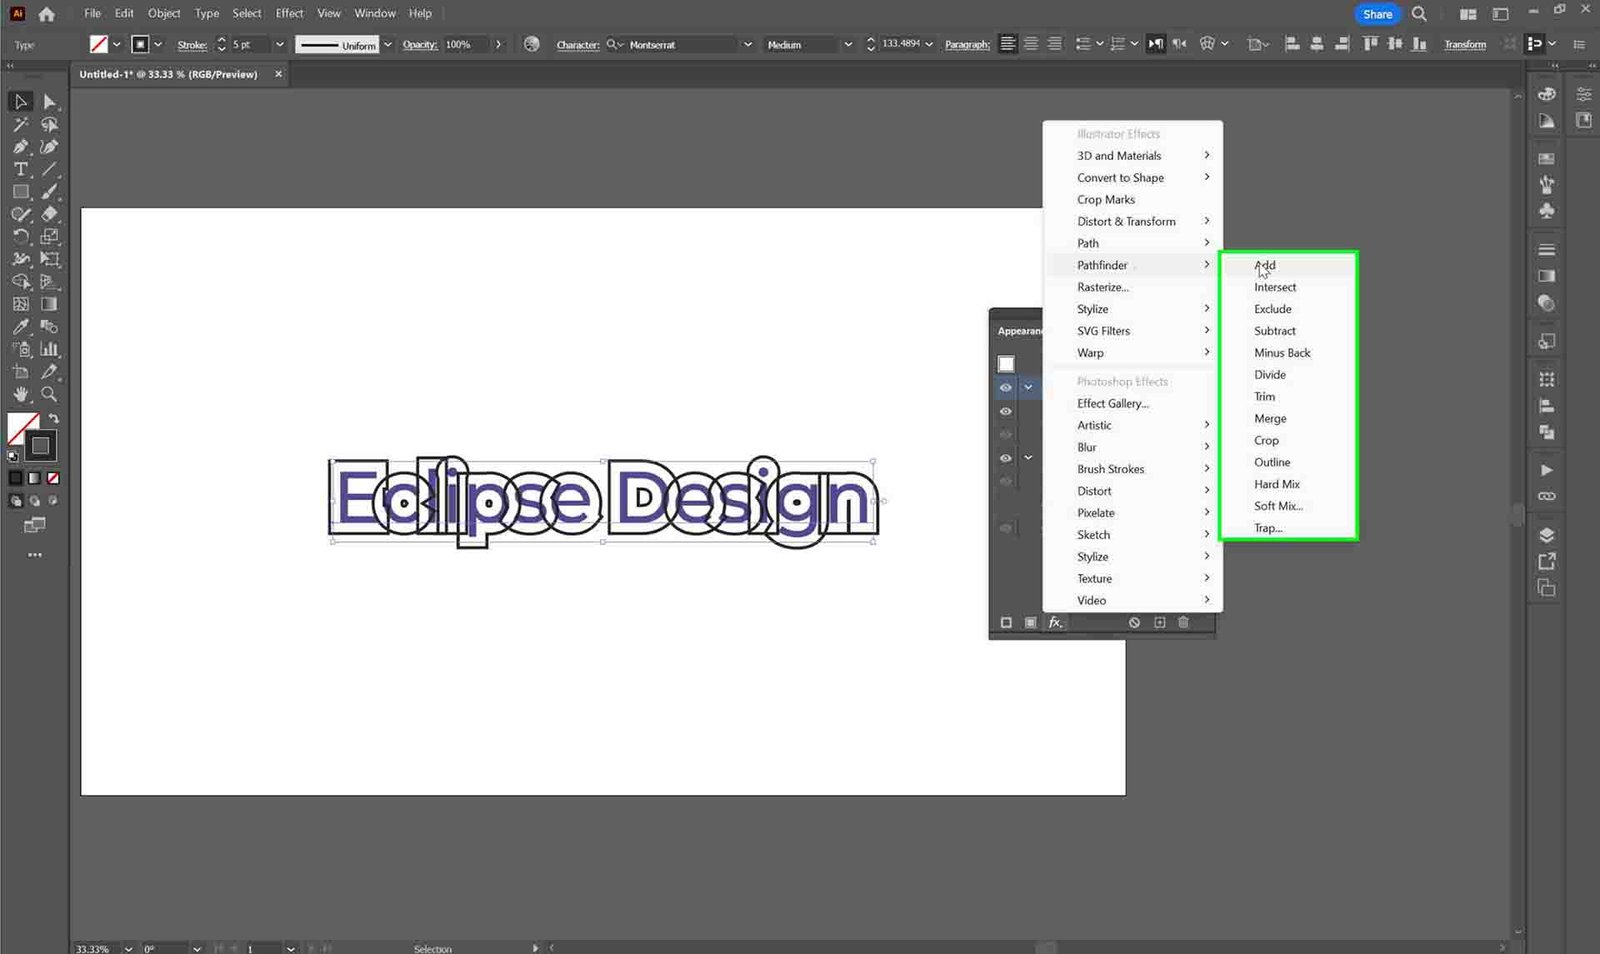
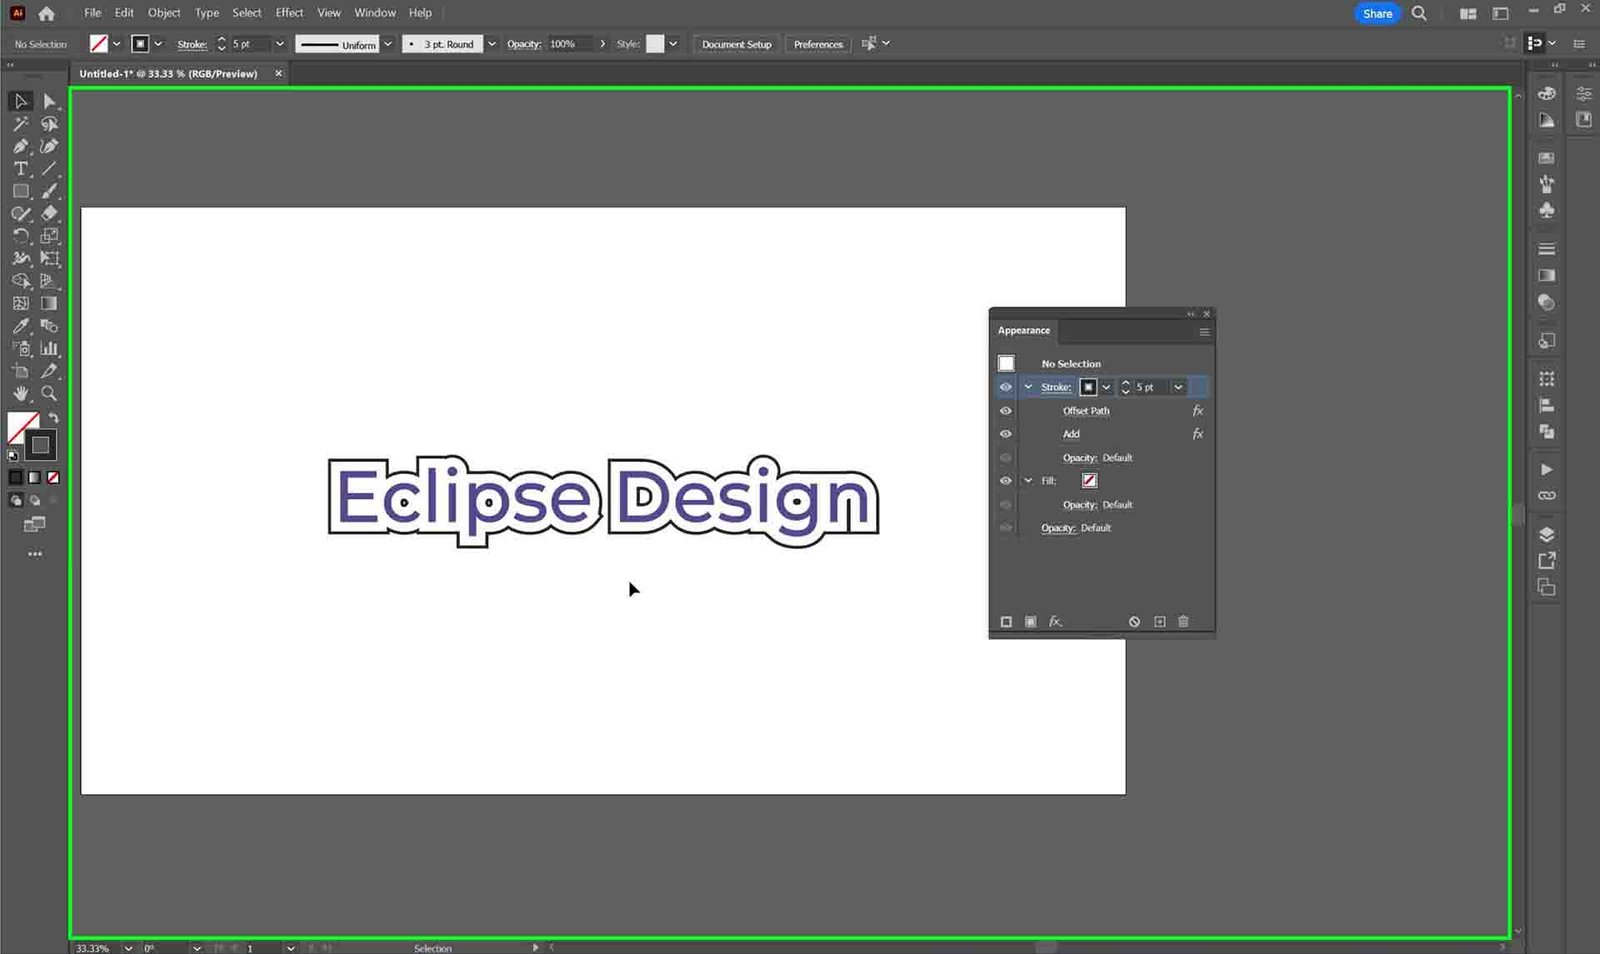
Once the stroke is offset, designers can navigate to the Pathfinder option, where the true magic unfolds. By selecting the “Add” function, the offset stroke seamlessly integrates with the text, resulting in a cohesive and harmonious design. This method proves to be a game-changer for designers aiming to break away from conventional text styling. It allows for the creation of dynamic and eye-catching effects without the need for intricate manual adjustments.
As designers navigate this process, they unlock the potential to transform text into a visually compelling element of their designs. The stroke offset and editing feature, often overlooked, becomes a secret weapon for those aiming to add a touch of flair and originality to their typographic creations within Adobe Illustrator.
Tip 5: Changing Path Direction
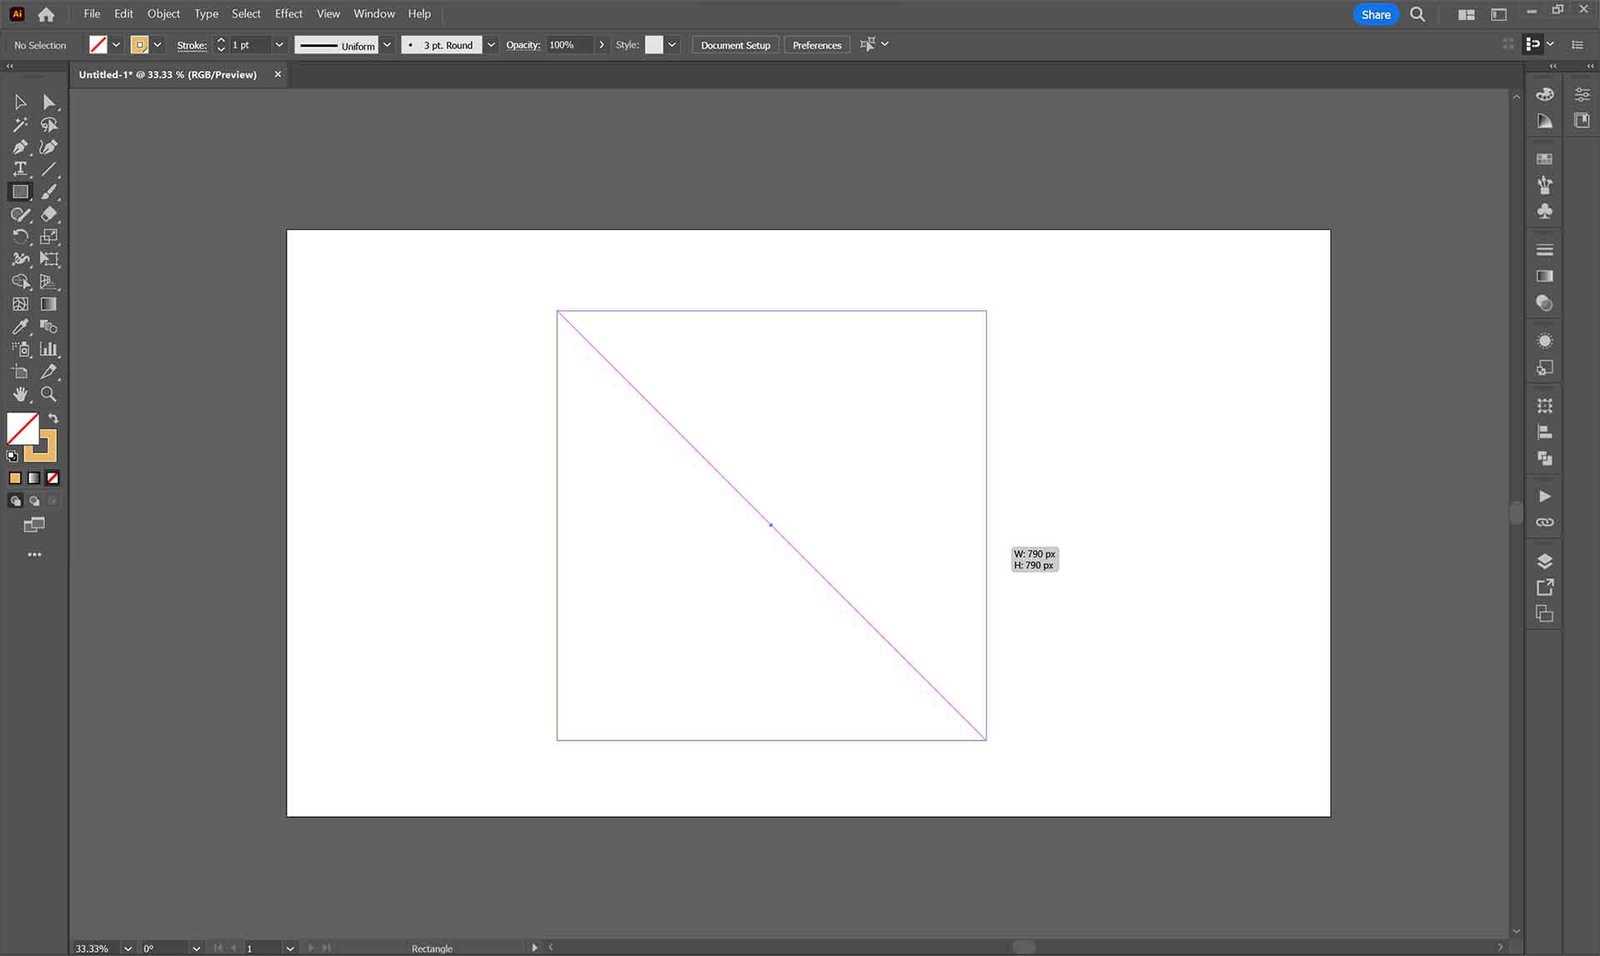
Changing the direction of a path in Adobe Illustrator is an essential skill that designers need to master. This feature gives designers precise control over the flow and orientation of their designs, making the creative process more seamless and polished. It’s a small yet powerful feature that can greatly enhance the overall quality of your work. Activating this function involves utilizing the pen tool and clicking on one of the anchor points to change the direction. To complete the task, hold down the Command/Ctrl button while clicking away.
By employing this technique, designers gain the capacity to manipulate paths dynamically, a particularly useful skill when working with intricate shapes and detailed designs. This ability to change the direction of a path presents itself as a versatile tool, offering designers a nuanced way to refine the contours and angles of their creations. Whether it is adjusting the trajectory of a line or subtly altering the curvature of a shape, this feature provides the freedom to make precise adjustments with ease.
Moreover, this method extends beyond mere path manipulation. Designers can also utilize the Width tool, accessed through Shift + W, for manual adjustments to the width of the path. This additional layer of control allows for fine-tuning the visual impact of the design, ensuring that every element aligns seamlessly with the envisioned aesthetic. The power to change the direction of a path, often overlooked, becomes a key player in the designer’s arsenal, enabling them to craft intricate and precisely tailored designs within Adobe Illustrator.
Tip 6: Precise Cursor Icons
Navigating the intricacies of detailed designs in Adobe Illustrator becomes a refined experience with the introduction of precise cursor icons. This often-overlooked feature subtly transforms the way designers interact with their work, offering a heightened level of precision and control. It is accessible through the preference settings by enabling “Precise Cursor Icons.” This tool provides designers with the freedom to maintain precision crosshairs without the need for a permanently engaged caps lock.
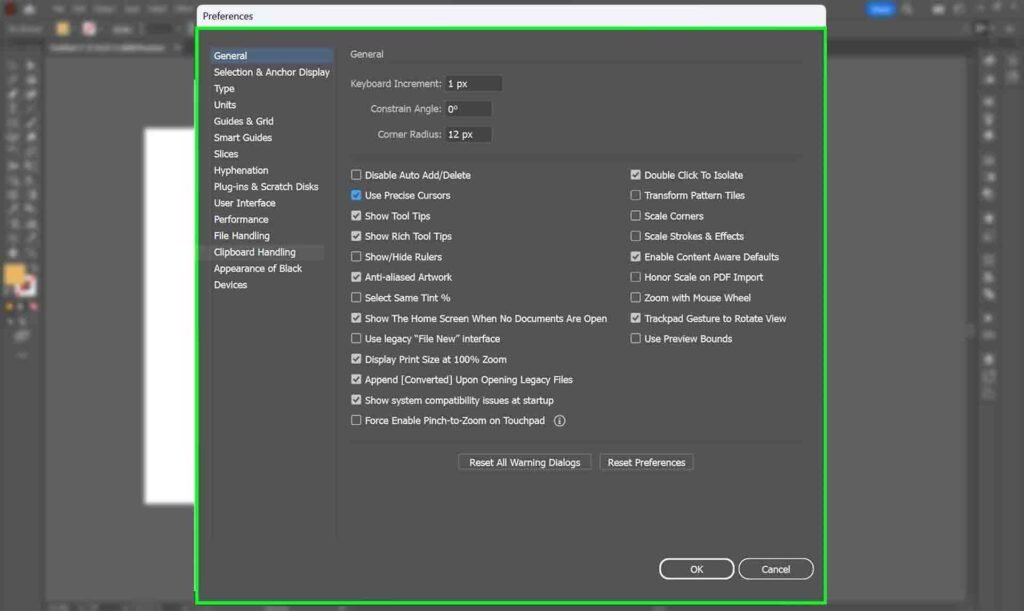
This enhancement is particularly valuable when working on intricate and detailed designs, where maintaining a clear view of the workspace is crucial. The ability to utilize precise cursor icons allows designers to maintain control over their tools without the visual obstruction of uppercase cursor icons. This subtle yet impactful setting becomes especially relevant when using tools like the pencil, where a clear view of the design is essential for an uninterrupted workflow.
Tip 7: Touch Type Tool for Text Manipulation
Introducing the Touch Type Tool, an often-unexplored feature within Adobe Illustrator that revolutionizes the way designers manipulate text. This tool proves to be a game-changer for text enthusiasts, providing a unique method for moving characters without the need to outline the text. Designers can access the Touch Type Tool under the Text section or click Shift+T, unlocking a new level of flexibility in text manipulation.
Once selected, the Touch Type Tool allows designers to seamlessly move characters up and down within a text block, introducing a dynamic element to text arrangement. While this tool simplifies the process of character manipulation, it is important to note that it lacks a shift option for maintaining a straight line. Designers can use arrow keys to nudge characters, with the option to hold down Shift to expedite the movement tenfold.
This feature becomes particularly handy in scenarios where precise text adjustments are required without resorting to the more conventional outlining method. Designers can now effortlessly fine-tune text placement, adding a layer of fluidity to their creative process. The Touch Type Tool, often hidden in the plethora of Illustrator features, emerges as a valuable asset for designers seeking intuitive and efficient text manipulation within their projects.
Tip 8: Controlling the Colors
Adobe Illustrator has a powerful feature for managing the number of colors in a design, allowing for precise color control. This feature becomes invaluable for designers aiming to fine-tune their color palettes or adhere to specific color limitations, as might be necessary in scenarios like designing for print.
To access this feature, designers navigate to Edit > Edit Color >Recolor Artwork, an often-underutilized gem in Illustrator’s arsenal. Here, you can find a color reduction option that allows for the adjustment of the number of colors within the design. This proves to be a crucial function for designers engaged in projects where color management is paramount, such as designing for branding, packaging, or ensuring print compatibility.
Moreover, the Recolor panel unveils additional capabilities, enabling designers to rearrange and manipulate colors effortlessly. This level of control over the color palette ensures not only visual harmony but also efficiency in design iterations. Designers can experiment with various color schemes and effortlessly modify the color distribution within their designs, showcasing the hidden depth of color management within Adobe Illustrator. As designers embrace this feature, they unveil a powerful tool that adds finesse and control to their color exploration and application.
Tip 9: Rotating Patterns Independently
Adobe Illustrator allows for independent rotation of patterns within a shape, providing designers with a new level of versatility in pattern manipulation and experimentation. The process begins with the creation of a pattern swatch using selected shapes within the Swatches panel. Once a pattern is established, designers can explore the Rotate menu (Object > Transform > Rotate), where they discover the option to exclusively rotate the pattern – “Transform Patterns.” By checking the “Transform Patterns” box, designers gain the power to rotate the pattern within the shape while keeping the shape itself stationary.
This feature opens up a realm of creative possibilities, especially for those engaged in designing intricate textures or patterns. Designers can experiment with diverse rotations within a single shape, adding dynamism and visual interest to their designs. The independence granted to pattern rotation allows for intricate detailing and a level of control that enhances the overall aesthetic appeal. As designers integrate this hidden feature into their workflow, they uncover a new dimension of creativity, transforming patterns from static elements to dynamic and adaptable components within Adobe Illustrator.
Tip 10: Creating Genuine Compound Paths
In the expansive repertoire of Adobe Illustrator’s capabilities, lies a lesser-explored facet that proves instrumental for designers seeking advanced shape manipulation, the creation of genuine compound paths. This feature distinguishes itself by offering a more profound level of control over shapes, providing designers with the tools to craft intricate designs with enhanced flexibility.
The process commences with the selection of shapes or paths that designers wish to combine into a compound path. Traditional methods might involve using the Pathfinder window, but there is a more sophisticated approach. By holding down the Alt key (Windows) or Option key (Mac) while clicking the Pathfinder function, designers achieve a more genuine compound path.
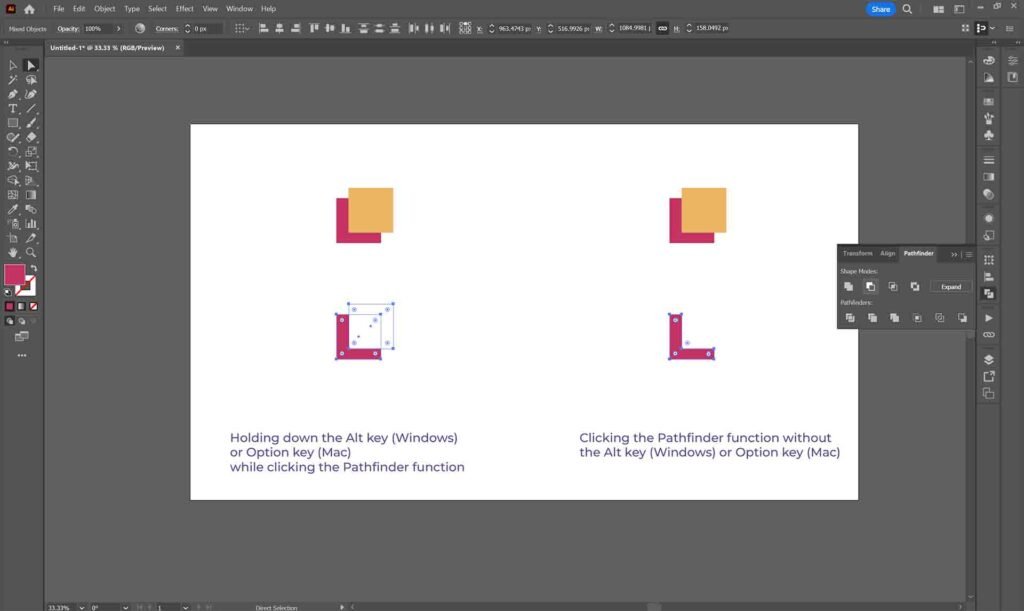
This nuanced technique unlocks a wealth of possibilities for shape manipulation. Designers can access individual components within the compound path, allowing for isolated adjustments to specific sections of their design. This feature becomes particularly valuable when working on complex illustrations or detailed designs where precision is paramount. As designers master this hidden capability, they gain a heightened level of creative control, elevating their ability to craft intricate and refined designs within Adobe Illustrator.
Conclusion: A Symphony of Hidden Illustrator Gems
In the culmination of these ten Adobe Illustrator tips, designers are equipped with a potent arsenal to elevate their designs to new heights. The intricacies of tiled window arrangements, swift grid creations, and the customization of default text settings provide a foundation for efficiency and precision. These subtle yet impactful techniques not only streamline workflows but also lay the groundwork for visually striking and cohesive designs.
Beyond these foundational elements, the exploration of stroke offset and editing, the ability to change path direction, and the precision offered by cursor icons contribute to a nuanced design experience. These hidden features become the keys to unlocking creativity, allowing designers to infuse their work with originality and finesse. Lastly, the mastery of rotating patterns independently and the creation of genuine compound paths offer advanced tools for those seeking to push the boundaries of design. As designers delve into these hidden gems within Adobe Illustrator, they embark on a journey of discovery and mastery, unlocking the full potential of this powerful design tool.
Frequently Asked Questions (FAQ):
How do I tile windows in Adobe Illustrator for efficient design work?
To tile windows in Adobe Illustrator, click on “Windows,” then select “New Window.” This will open the same project in a secondary window. Once done, navigate to “Windows,” choose “Arrangement,” and click on “Tile.” This arrangement allows you to work on specific details in one window while maintaining an overall view in another.
Can I customize the default text settings in Adobe Illustrator?
Yes, you can customize default text settings in Adobe Illustrator. Navigate to the Character Style Options menu within the appearance panel. Here, you can set your default font, leading (spacing between lines), kerning settings, and other parameters. These defaults will apply every time you generate text, ensuring a consistent and personalized typographic style.
How can I control the number of colors in my design using Adobe Illustrator?
To control the number of colors in Adobe Illustrator, use the Recolor panel. Here, you can adjust the color count in your design. This feature is particularly useful for projects with specific color limitations or when designing for print. The Recolor panel also allows you to rearrange and manipulate colors within your design seamlessly.
What is the Touch Type Tool in Adobe Illustrator, and how can I use it for text manipulation?
The Touch Type Tool in Adobe Illustrator is a valuable feature for moving characters within text blocks without the need to outline the text. Select the Touch Type Tool, and you can move characters up and down. Remember, there is no shift option for a straight line, so use arrow keys for precise adjustments.
How do I rotate patterns independently within a shape in Adobe Illustrator?
To rotate patterns independently within a shape in Adobe Illustrator, first, create a pattern swatch in the Swatches panel. Then, go to the Rotate menu, Object > Transform > Rotate, and check the “Transform Patterns” box. This allows you to rotate the pattern within the shape while keeping the shape itself stationary, offering a dynamic and versatile approach to pattern manipulation.
Do you have any feedback on the article? Contact us and help us improve our posts